Jeanette - Off The Cuff

My photo
My name is Jeanette, and I was born in Sweden. I've been a life long artist, and designer, who took a plunge into surface pattern design in 2022, currently selling at Spoonflower and Raspberry Creek.

Tuesday, February 22, 2022

Meredith's Meatball Phở

Once upon a time in 1984, when my family moved to the United States, I was a little girl, and our neighbors became good friends with my parents. They had a daughter that was the same age as me, and we became fast friends. We roller skated in her garage, to the Pointer Sisters, Wham! and Prince, and swam in the lake, and caught sunfish and left them to "dry" on the pontoon, where we forgot them for several days, and then decided to toss them back in the lake. Who knew that sun-dried sunfish were buoyant? They floated to shore and bobbed in the waves.

As a child of the 80s, it's also worth noting, that my dear friend got me my very own  Cabbage Patch doll for my birthday. And for one glorious week in the summer, our two families rented a full sized motor home and vacationed together all over Minnesota and Wisconsin, hitting up all the mini golf courses, RV parks, water theme parks, and camp sites. These are those lingering sweet memories of my youth.  Anyway, we moved many times, time passed, and we did -- as kids did in those days -- stay in touch via regular letter writing. Thanks to modern times, internet, and social media, we are now still able to exchange photos and updates with far more frequency than we did the last few years.  And since I'm a newbie mom with little to no time to blog about recipes, I asked her to share a guest post with me that she had written about on Facebook.

She had me at "Phở" ... This Vietnamese savory soup is easily one of my favorites! (Note: I may add more photos when I get a chance to make this myself. )

So here it is:

Meredith's Meatball Phở

1 lb. Ground pork
1 cup water chestnuts, small dice; divided.
1/2 cup soy sauce; divided
1/4 cup fish sauce
1 tsp. Fresh ginger puree; divided
1 tsp. Fresh garlic puree; divided
1Tbsp. Dark sesame oil
2 quarts chicken stock
1 package rice noodles (fresh preferred)
1 cup asparagus chopped into 1" pieces
1 cup oyster mushrooms, cleaned and chopped into bite-size pieces
1 head bok choy, sliced
1 cup snow peas, halved
Garnish:
1 bunch green onions, chopped; divided
1 bunch pea shoots (or bean sprouts)
Fresh cilantro, chopped
Sriracha
Fresh lime (optional)

For meatballs:
Place ground pork, half of the pureed ginger, garlic, water chestnuts and soy sauce in a bowl. Mix well with your hands, and roll into approximately one and a half inch meatballs. (Should make about 24). Place on baking sheet and bake in 350° oven for 20-25 minutes.

For soup:
In a large pot on medium low heat,  combine stock, remaining ginger, garlic and soy sauce. Add fish sauce and bring to a simmer. Add in snow peas and asparagus and simmer for 5 minutes. Add mushrooms, bok choy, some green onions and noodles. Cook until noodles are soft.

When ready to serve, add meatballs and garnish as you like.

This is ALWAYS a hit in our house no matter what fresh ingredients I use!


Sunday, November 3, 2019

Lemon-Ginger Glazed Sweet Potatoes


Happy Fall! Here is a Thanksgiving family favorite, Lemon-Ginger glazed Sweet Potatoes, (or yams, as many people call it, but more on that in a minute...**) that I have made some small tweaks to, in the last few years. The original recipe called for boiling the sweet potatoes first, then peeling them, and it used ground ginger powder, versus fresh ginger, and it also had much more brown sugar in it than mine. But I find my technique of peeling and roasting it in the oven is just as good (if not slightly better,) and the fresh ginger, and reduced sugar makes for a lighter, fresh-tasting and tangy version of the recipe. I don't even know where our mom found the original recipe, and all I had was her hand-written notes to go by.   It became a  yearly staple for our Thanksgiving table, and I frankly can't recall a time when we didn't eat it, so it has probably been in rotation for a good 25 or 30 years.

Thursday, April 5, 2018

Citrus Spice Banana Doughnuts


To quote Pink Floyd, "Hello ... is there anybody out there?" As if becoming a mom didn't distract me enough from blogging recipes the last 3 years, my blog has languished further due to a year of personal loss, when my beloved mamma died unexpectedly last May.  As hard as it has been, we have still had to cook meals, and feed our families, albeit at times with far less inspiration and interest. However, my sister and I have found great connection with each other and our mom, in the kinship and catharsis of going through her 40 years worth of recipes. This became especially necessary in preparing traditional holiday treats,  and many of our mom's personal culinary inventions as we have mourned her absence during those special seasons of the last year.
 
Today it's been an extra dreary rainy, gray spring day, and I felt an urge to bake a banana bread  with my almost 3 year old boy,  but as he insisted on "Helping" far more than I asked,  he also added fresh ground pepper to the recipe.  So in order to salvage it I added a few additional spices to enhance the citrus and banana flavors.  And then I thought to bake the dough in doughnut pans instead of as a loaf.  It did not disappoint! However,  I only have one photo,  so you'll have to imagine the rest!

The original recipe,  which I departed from, was found in  Good Kitchen Magic.

Ingredients:
4 mashed bananas
1 egg
1/3 cup coconut oil
1/2 cup sugar (could probably be reduced by half if your bananas are bigger)
1 orange, zested
1/4 tsp fresh ground black pepper
1/4 - 1/2 tsp fresh ground ginger
1/2 tsp fresh ground cardamom
2 cups flour
1 tsp baking powder

Directions: 
Blend sugar,  egg, oil and bananas together well,  and add zest of 1 orange,  1/2 tsp fresh ground black pepper  [My son's  idea!], 1/2 tsp fresh ground ginger and 1/2 tsp fresh ground cardamom [my idea!]. 
Add 2 cups flour and 1 tsp baking powder while stirring. Continue to mix until smooth.  Distribute into doughnut pans, level to the top edge,  as they'll rise while baking.  Bake at 350 for about 20 minutes until lightly browned.

They're delicious warm from the oven, but I would wrap them in air-tight foil or plastic or a zippered bag or container to keep them from drying out too fast if you can't eat them right away.

Tuesday, January 10, 2017

Asparagus and Cheese Tart

Howdy, howdy everyone! It's been a few moons, but today I'm letting you enjoy this savory treat, courtesy of a friend of mine, Julia, who recently posted a photo of this delicious looking asparagus tart that she had found on FoodNetwork.com, and was kind enough to share it with me. So here below the jump-break is her blog post. Welcome to Off The Cuff Cooking, Julia!


Friday, January 6, 2017

Cranberry Citrus Oatmeal

Every year for Thanksgiving, I make a variation of the standard Cranberry-Citrus sauce recipe (that is often on the back of the bag of cranberries.) I inevitably end up with huge amounts left. Last year, I started adding it to my oatmeal as a way of using it up, and it was really good! You could also use this sauce as a condiment to roasted chicken or pork, or even grilled salmon. The standard recipe doesn't call for any seasonings but I find it satisfying to add fresh ginger and cinnamon to this sauce.
  

Monday, September 26, 2016

Lemon Curd

If you're not familiar with lemon curd, this is a very classic British lemon-spread to put on scones, or other pastries. (Try it on pancakes, or in homemade Danish, for instance.) Lemon curd is bright, smooth, velvety and rich, and it pairs so well with a hot cup of Earl Grey. 

This is a breakfast staple at my parents' house, so I've grown up eating it, but this very batch that I'm sharing with you here is the FIRST time in 42 years of living that I finally got around to making myself. And it was super easy, and very fast. I think zesting the lemons took 1/3 of the total time.

Monday, January 11, 2016

Mango Coconut Almond Granola

A few years ago, I got tired of buying a box of granola for $4 every few days because we eat it a lot, and I kept thinking about the cost per ounce, and how absurd it was that we'd maybe be able to get 8 bowls worth on our yogurt which ends up being like 50 cents per 1/2 cup, give or take. I knew it would be cheaper to make my own, especially since I have that magical item in my purse that allows me to shop like royalty; I'm talking about the CostCo card!

After some loose inspiration from a recipe in Real Simple, I doubled the batch so it would last us at least 2 weeks, not to mention I constantly alter ingredients, embellish a bit and switch things around as I'm inclined to do.

Friday, June 26, 2015

Kombucha

Raspberry Ginger Kombucha on the rocks
EDITED 01-25-2016 with an important medical note. Due to my own naive overconsumption of Kombucha, I was actually causing damage and stress to my liver, which was discovered with a standard blood test. Please be aware that this is a beverage with live organisms in it, and it should only be consumed in small quantities, as a "health tonic." At most 4 or 5 oz per day. I was actually drinking 12-16 oz per day, the way I might have regular ice tea in a big glass. My dear friend and "sister-in-law-once-removed", who is a nutritional therapist, did some extensive research and learned that people who have had toxic mold exposure should not drink kombucha at all, nor have raw vinegar with "the mother" in it.  That all rings a bell for me, because I was chronically exposed to toxic mold for 3 years in a rental house in the 1990s.  Furthermore, after discovering my off-kilter lab work, I told all my friends who drink kombucha to be cautious. One of my friends also decided to get bloodwork done and her liver enzymes were also elevated after regular kombucha drinking. So please use caution! As fun as it is to make this natural beverage, if you are in doubt at all, ask your doctor to run some bloodwork on you, especially if you feel more fatigued or lethargic, or start having any illness symptoms after consuming it. I am not a doctor. I am just sharing my own experience in the last 3 months, after six months of daily kombucha drinking.  As for myself, I'm afraid my kombucha drinking days are over. I'll miss it's tart, fizzy effervescence, but I only get one liver.

Tuesday, June 2, 2015

Turkey Chili

This chili came together a month or two ago, but I made it again 2 more times, and it's always yummy, so I figured I should blog it for my fateful... uh... I mean, Faithful followers.

This one is on the milder, savory side. You could definitely pack some heat into the mix by increasing spices or adding some hot sauce or jalapenos but I liked how it was really tasty, and could be kid friendly as well, if that's a concern to anyone.

So... as pictured here below, the contents are pretty simple.


INGREDIENTS: 

1 package ground turkey
1 cup cooked rice
1 can kidney beans *(or try other beans, instead of kidney / black)
1 can black beans
1 can diced tomatoes
1/2 can tomato paste (Cont'd below)
 

1/2 yellow or white onion, finely diced
1 tsp Oregano (more to taste)
1 tsp salt
1/2-1 tsp ground coriander
1 tsp smoked paprika
1/2 tsp ground white pepper
1/2 tsp Chili Molido Powder
1 whole chipotle pepper

(Optional, 1/2 tsp cayenne powder, to make it spicier)

DIRECTIONS:

Begin by dicing up the half onion, into small pieces,  and then add a bit of butter or vegetable oil to the bottom of a large soup pot or cast iron Dutch Oven, over medium heat. Add onions, and sautee, stirring often until translucent or slightly caramelized.


Turn up heat to medium high, and add in ground turkey. Break it up frequently with a spatula or spoon to brown it evenly.  When it is cooked through, pour in spices and seasonings, and add all the canned ingredients. Let this simmer for at least a half hour or more.

Serve to your liking, with shredded cheese, corn muffins, sour cream, chopped onions,  or other toppings like hot sauce, jalapenos, or chives.

For more chili of my chili recipes, check out these options, Sweet potato chili and Black Bean Chili with Cilantro.

Until next time!

Monday, May 11, 2015

Pistachio Cedar Planked Salmon, and Salmon Leek Chowder


Here are two easy and salmon recipes I made yesterday and today, all from one four-pound $20 whole salmon. If you can learn to fillet and debone your own fish, you can save so much money on seafood dishes. So here is Pistachio Crusted Cedar-Plank Salmon, and Salmon Leek Chowder.

Saturday, February 14, 2015

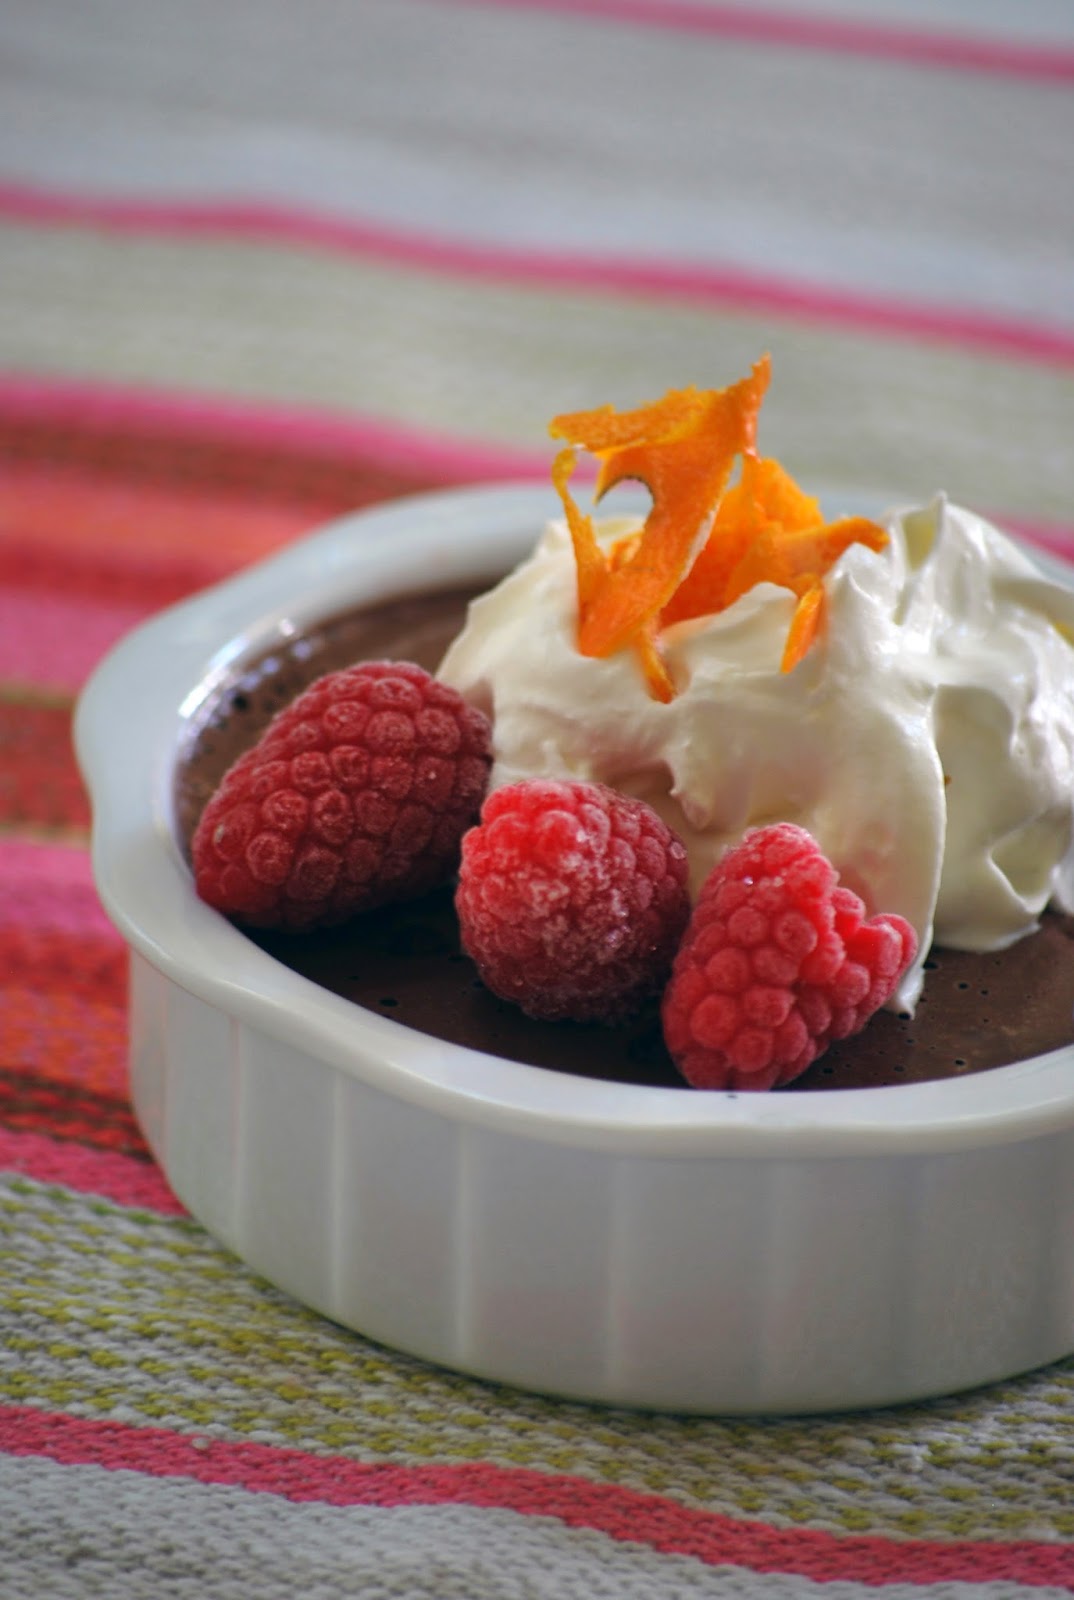
Orange-Raspberry Pots De Creme

I've been making this recipe for a year or two ever since I first saw it on The Pioneer Woman's website. The beauty of it is that it only takes a few minutes to prepare. And you do it ALL in the blender. You could make this with as few as 4 ingredients, or add a few extras for oomph. It looks super fancy, and tastes so rich and decadent that you could easily fool your guests into thinking that it has taken hours of cooking over a hot stove.

I made a few tweaks to the original recipe, just to switch up the flavor profile a bit. Other than that, all credit goes to the inspirational and beautiful Ree Drummond!

INGREDIENTS:

12 oz chocolate chips
4 eggs
1/2 tsp sea salt
1 cup piping hot strong coffee * (see my suggestions)
1 cup frozen or fresh raspberries
Zest from 1 orange
1 tbsp Triple Sec (I used DeKuypers, but if you're fancy, by all means get the Cointreau or something.)

Whipped Cream for topping.

DIRECTIONS:

First brew about 1-2 cups of coffee -- very strong.


I would suggest using double the normal quantity of coffee grounds to what you normally use, to assure a really concentrated flavor.  Personally, I made my coffee as Pour-Over (which, for the uninitiated, is exactly what it sounds like: A method of manually pouring hot water through a coffee filter in a cone straight into a measuring cup.) For my pour-over, I used about 3 tablespoons of coffee beans, to 1.5 cups of boiling water (assuming that almost half the water will get trapped into the ground coffee).


To really extract the flavors, I actually ran the coffee through the same grounds 2 more times. I'm sure there are baristas that would faint from reading that, but I'm just keeping it real!


Get your blender set up and have all your ingredients ready.


Distribute the raspberries evenly into the bottoms of ramekins, small demitasse coffee cups, or mini Mason jars. 


Next crack the eggs into the bottom of the blender, add the chocolate chips, liqueur, and salt.


Zest an entire orange and add the zest into the mixture.


Run blender on high, until there is a pudding-like texture.  While that's happening, microwave your coffee for a minute again to make sure it's super hot. It has to be hot enough to set the egg-proteins up like a custard. Pour the coffee into the blender, and run it on high again to mix in the coffee, and then immediately pour the mixture into the prepared ramekins or jars. Let it set up in the fridge for at least 2-4 hours before serving.

Top with whipped cream, some raspberries, and/or orange rind for a nice garnish. And pace yourself. You'll want to eat it all really fast, but also want to savor each bite.


FLAVOR SUBSTITUTIONS:
Ideas that could be swapped for the orange/ raspberry combo, would be to use mint extract, Kahlua, vanilla extract, or a shot or two of spiced rum just to take this in a different direction.   Or use white chocolate chips and instead of coffee, try using very hot, double-strength Earl Grey tea and lemon zest. Lots of variations that might be fun to experiment with.


Thursday, January 8, 2015

Chicken-Bacon-Dijon-Pot-Pie


Anyone remember David Cross singing "Chicken-pot, chicken-pot, chicken-pot-piiiiiie" on "Just Shoot Me" ...? It's kind of an obscure reference, but it makes me laugh every time I think of it.

Now then, some disclaimers.

1. I'm a pretty decent cook, but I'm a mess when it comes to pie crust. This one actually turned out quite okay taste and texture wise, but it was hard to roll out and kept splitting apart. Nine out of ten times, I get a store-bought rolled pie crust for my quiches and pies, because well, it's $4 toward me not having a meltdown in the kitchen. Trader Joe's has a good one that I like which is not full of weird synthetic ingredients. However, I was not at TJ's yesterday so instead I opted to make my own crust, and I used the recipe in this book Good Kitchen Magic which I think should make a good crust in theory. My trouble is that I don't usually get the dough to bind together with the first 2 tablespoons of water as they say. Sometimes even the 3rd tablespoon of water doesn't do the trick so maybe I'm using too much flour. Who knows. Either way, I won't chide you for using a store-bought crust, because I do it all the time myself.


2. This is NOT a quick meal. It can be made significantly faster with a few shortcuts, which I'll put in parentheses next to directions or ingredients. Of course, as with any of my recipes, alterations are often necessary.

3. Even though I know my way around a DSLR, it is January in the Pacific Northwest, and rather gray, and I have no window light in my kitchen, and it was dark outside anyway, so I have done my best to get some good photos with my tripod and bounced light.

4. Because of the multiple steps and ingredients, read this all the way through before starting the recipe so you see the way I split up my directions and ingredients.

5. This recipe can make two 6-inch pies, (I made my pies in cast-iron skillets) or one larger 9-inch pie either in a skillet or in a glass pie dish, so you'll divide up your dough and filling accordingly. 

Thus, I present you with Chicken-Bacon-Pot-Pie.


Tuesday, October 21, 2014

Garlic & Pink Peppercorn Butterflied chicken with Pan Gravy


Woopity-doo!! I'm posting a recipe! I think some of you will find this one worth the wait, at least in terms of the gruesomeness of the step-by-step photographs. I have been hoping to do a photo-journalistic instruction on how to butterfly a chicken (a trick I only learned myself last year) but it's so useful for doing whole birds.  Bonus: It was a reasonably sunny afternoon (which meant BETTER PHOTOS!!) And Bonus #2: I wrangled my husband into manning the camera and tripod I didn't have to wash my raw-chicken hands every 3 seconds, set the camera timer. That would have been tedious, and impractical. So thank you, dear for making this infinitely easier. Good job on the pics, too!


Anyway, back to the bird at hand.

Thursday, August 7, 2014

Red Curry Barramundi

Barramundi! Barramundi!! That's fun to say. (I feel like Will Ferrell in "Elf" when he keeps repeating "Frrrrancisssco!! That's fun to say!" Speaking of which, Christmas is less than 5 months away. Wow. And I have not posted a recipe since March. My sincere apologies, but I doubt if any of you feel bereft.)

Anyway. Barramundi! I had never heard of this relative of the Sea Bass (which reminds me of the "Kick his @, SeaBass" line from "Dumb and Dumber" ... okay, I'll stop with the movie quotes.)

So sea bass... Barramundi. I do have a point. I had never heard of this fish before, but saw frozen fillets at CostCo recently and thought I'd take a crack at incorporating it into my seafood rotations.  It's a mild, flaky, white fish, and it's considered a sustainable seafood variety. The fillets defrost quite fast in a bowl of cold water, and cook easily since they're evenly thick.

I've tried a few different twists on using it in Fish Tacos (I'll blog that some other night) and then last night I was jonesing for Red Curry, so I thought rather than chicken or pork, I'd put fish in it.  I had a few garden-fresh veggies from my yard, and incorporated some green onions, yellow zucchini, sugar snap peas, and then a few other things from my refrigerator. 

This is the link to the company that markets Barramundi: The Better Fish


Sunday, March 30, 2014

Basil Mozzarella & Pistachio Mushrooms


I hastily made these little appetizers for a party last night. I have made other mushroom cap hors d' oeuvres before, usually with garlic, parmesan, parsley, or some similar combination. But last night I was trying to figure out what I had on hand, and this was the end result.  Took about 10 minutes to make them, not including the oven-time.

And since I -- as par for the course -- have not posted a new recipe for 2 months, this was a quick one to upload for you to try out.

The measurements are approximate, since I was in a hurry and did not write anything down.

I also only have one photo from the end result, so you can use your imagination for the rest.  (PS. In the photo I intentionally left off some of the pistachios for a friend with nut allergies.)

INGREDIENTS:
Baby Portabella mushrooms (approximately 24-36 depending on the size)
1/4 lb mozzarella (I used firm kind, instead of "fresh" so it wouldn't be as runny when melted)
1 stalk of green onion, or equivalent amount of chives
2 or 3 fresh basil leaves
1 or 2 tbsp olive oil

1/2 cup of shelled roasted pistachios

DIRECTIONS:

Begin by snapping off the stems on the baby portabella mushrooms carefully so that they leave a little cup to stuff.  If the stem breaks too much, you can scoop it out with a teaspoon carefully to hollow it out. Brush off any loose dirt with a paper towel, or pastry brush. 

Trim off the root end and wilted green tops on the green onion stalk, and cut it into smaller discs.

Use a blender or mixer to puree together the cheese, basil and green onion with the olive oil. Use a teaspoon to scoop cheese mixture into each mushroom cap, and top with a couple of pistachio nuts.

Roast in the oven at 350 degrees for about 10-12 minute until cheese is bubbly and hot.  They are good served warm, but also quite tasty even at room temperature.  They are really easy to make, and pretty fancy-tasting.  The basil makes a nice bright flavor contrast to the umami earthiness of the mushrooms, cheese & pistachios.  Try experimenting with other herbs if you'd like-- sage, oregano, or rosemary, used in moderation so as not to be too bitter.  Remember a little goes a long way.


Sunday, January 19, 2014

Smoked Salmon Pasta a la Greta Garbo


Greta Garbo-- star of the silver screen, one of the most iconic faces of the Golden Era of Hollywood, well known for her roles in Anna Karenina and Camille -- was also famously Swedish, which means she shared her heritage with yours truly.  Okay, so we're not related that I know of, but we do have that DNA overlap.  Allegedly, this is her favorite pasta-dish, culled from one of my mom's Swedish cooking magazines, and I would like to imagine that on those days when she "Vanted to be alooone" she curled up in a cozy wool blanket with a big bowl of this stuff. 

This is another one of those stand-by dishes my mother has made since I was a little girl, and in fact, here is the original recipe that Dad scanned for me from Mom's cut-out recipes in a binder.  It is really quite quick to make, and something like elegant comfort food!

The heading there says "Celebrities' favorite recipes".  Even if you have no idea who this mega-star of the 1930s was, make this dish, and pour up a glass of crisp white wine...

INGREDIENTS:

1/2 lb smoked salmon, cut into small chunks -- (Also, please note that the type of smoked salmon that I use is the "hot smoked" salmon that is more firm, and crumbly, and still has skin on that needs to be peeled off.  The cold-smoked salmon that still looks more like Lox and still can be sliced into thin strips is not the kind I would recommend in this recipe.)
1-2 cloves garlic
1 tbsp olive oil
1 cup heavy cream
2-4 ripe, red tomatoes, such as plum, Campari or Roma (or one can diced tomatoes)
2 tbsp fresh parsley, (you could also use basil or oregano to sprinkle)

Pasta -- enough for four servings, preferably a thick toothy kind, like linguine, tagliatelle, pappardelle, or fettucine

DIRECTIONS:

Blanch the tomatoes in boiling water for a few seconds until skins split.  Set aside and cool to touch, and then peel off the skins. 

Cut up salmon and tomatoes, and mince garlic.  Start with one clove, add more if desired....

Heat the oil in a skillet or sauce pan at medium, and then stir in tomatoes, garlic and salmon.  Stir over medium heat for a minute or so to heat through, and then pour in cream.  Reduce heat, and let simmer, while pasta is cooking. 

Drain pasta, drizzle with more olive oil, if desired, and ladle into bowls, and top with salmon-sauce.   Sprinkle with grated parmesan if desired, and sprinkle on fresh parsley (or basil or oregano.)

Friday, January 10, 2014

The Official Off the Cuff Tutorial on Kitchen Organization

An organized kitchen makes cooking more fun, and far more efficient
LONG POST AHEAD.  I'll try to break it up with my sardonic humor, and photographs. 

I have been tossing this around in my head for a while, and decided to create a separate blog post on how to organize your kitchen area and make it as functional as possible.  Cooking is a complete drag if you feel like it's a chaotic endeavor that requires a lot of running around.  And, of course, I have now finally come to a point in my life where I have lots of cabinets, an ample kitchen island and a spacious work area.  So lest I come across as condescending, talking about how to organize a kitchen, when many of you have tiny apartments and/or rickety old cabinets and lack of functionality, I just want to assure you that I have also lived in places with small kitchens and lack of counter-space.  My goal here is to provide you with as much useful information for making the best of what you *do* have. For someone endeavoring to make use of this kitchen organizing session, I would set aside a whole day, and remain flexible to tweak things after the fact, if you find that you under-assessed some of your needs.


Ultimately, cooking and maintaining your kitchen will be easier and more fun when there is a good groove and flow.  (Groove and flow.  Sounds like some new sub-genre of electronic music, doesn't it? First it was Drum and Bass, Jungle, Trance, Techno, and now it's Groove and Flow.  So on that note, crank up some good music and let's get to it.)

Thursday, January 9, 2014

Oven Pancake

Happy New Year...

I get busy-- as you can tell it's been almost 3 months since my last entry, but I made a quick "Oven Pancake" last week, and managed to take one (not very good) photo of it right before I devoured it.

Oven Pancake, or Ugnspannkaka as we call them in Da Ol' Country, is also similar to Dutch Babies, or German Pancakes, but the ratio of flour, eggs and milk is a little different.  Traditionally, a Swedish Ugnspannkaka (Oongs-pun-KA-kah) is served slathered in melted butter, topped with lingonberry preserves, and sides of crispy bacon.  It sounds like it should be a breakfast meal, and honestly, I don't know why it couldn't be, but we have always eaten it for dinner growing up.  I didn't have any bacon that night, but I did have some homemade frozen pork-sausage patties which were delicious on the side as well.

INGREDIENTS:

2 eggs
2 cups milk
1 cup flour
1/2 tsp salt
Butter for  greasing baking dish, and for spreading on top
Cranberry or lingonberry preserves (or other fresh fruit, or other preserves of your choice)

[Could that list of ingredients be any easier? You probably have all of that on any given night.]

DIRECTIONS: Beat all ingredients in a bowl, until well blended and a little bit frothy at the top.

Pour into a buttered baking container of some sort. (A small lasagna pan, for instance, or an oven proof cast iron skillet would also work as long as there was plenty of butter in the bottom of whatever it is to keep the crust from sticking.)

Bake at 375-400 degrees for 30-40 minutes.  (If your oven tends to run hot, go for 375.  You don't want the top to burn.)  The Oven Pancake is done when it's browned on top, bubbling and fluffed up around the edges and the center is firm to the touch. 

Saturday, October 19, 2013

Chicken Pumpkin Paprikash

"Waiter, there is too much pepper on my paprikash." -- Harry Burns

Well, if you're a fan of late-eighties chick flicks starring [pre-collagen] Meg Ryan, wearing ill-fitting, floppy sweaters, chunky shoes and otherwise being her adorable self, then you've probably seen the classic "When Harry  Met Sally," and you might remember that scene at the museum where they are talking all funny about Paprikash.


I had not had much insight into this dish in the past.  So sometime last year, I decided to look it up, and was not disappointed.  It's one of the most yummy and reasonably healthy comfort-foods, especially delicious on a cold, foggy autumn evening such as tonight.  Not only that, but it's quick.  I can whip up a skillet full in about 25 minutes, which hits the spot every time. 

Thursday, August 1, 2013

Congratulations to....

The winner of our July contest for my birthday month is Christiana at YarnDarlin who wins the OXO Cheese Plane! Thanks for participating, and be sure to stay tuned for future contests, new recipes, organizing tips, and cleaning tips in the coming weeks and months.